 Popular Blog Posts
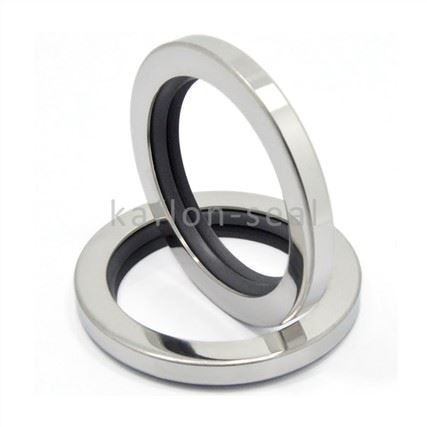


 Blog
BlogHey there! As a supplier of Hydraulic Wiper Seals, I've dealt with all sorts of issues related to these little but crucial components. Today, I'm gonna walk you through the process of removing a worn-out hydraulic wiper seal. It's a task that might seem a bit daunting at first, but with the right steps and a bit of know-how, you'll be able to handle it like a pro.
Why Remove a Worn-Out Hydraulic Wiper Seal?
First off, let's talk about why you'd even want to remove a hydraulic wiper seal in the first place. Hydraulic wiper seals are designed to keep dirt, dust, and other contaminants out of the hydraulic system. Over time, though, they can get worn out due to constant friction, exposure to harsh chemicals, or just plain old age. When a wiper seal is worn, it can't do its job properly, which means that all those unwanted particles can start sneaking into the system. This can lead to all sorts of problems, like increased wear and tear on other components, reduced efficiency, and even system failure. So, removing and replacing a worn-out wiper seal is an important part of maintaining your hydraulic system.
Tools You'll Need
Before you start the removal process, you'll need to gather a few tools. Here's what I recommend:
- A set of wrenches: You'll need these to remove any bolts or nuts holding the hydraulic cylinder in place.
- A seal removal tool: This is a special tool designed to safely and easily remove the wiper seal without damaging the cylinder or other components. You can find these at most hardware stores or online.
- A clean cloth: You'll use this to wipe down the cylinder and remove any dirt or debris.
- A lubricant: This will help make the installation of the new seal easier.
Step-by-Step Removal Process
Now that you have your tools, it's time to get started. Here's a step-by-step guide to removing a worn-out hydraulic wiper seal:
Step 1: Prepare the Work Area
First, make sure you have a clean, well-lit work area. You don't want any dirt or debris getting into the hydraulic system while you're working on it. Lay out your tools and make sure you have everything you need within reach.
Step 2: Depressurize the Hydraulic System
Before you start removing any components, it's important to depressurize the hydraulic system. This will prevent any sudden releases of pressure, which could be dangerous. To do this, follow the manufacturer's instructions for your specific hydraulic system. Usually, this involves turning off the power and releasing any pressure in the system using a pressure relief valve.
Step 3: Remove the Hydraulic Cylinder
Once the system is depressurized, you can start removing the hydraulic cylinder. Use your wrenches to remove any bolts or nuts holding the cylinder in place. Be careful not to drop any of the bolts or nuts, as they can be difficult to find if they fall on the floor. Once the cylinder is loose, carefully remove it from the system and place it on your workbench.
Step 4: Locate the Wiper Seal
The wiper seal is usually located at the end of the hydraulic cylinder, near the rod. It's a small, circular seal that fits snugly around the rod. You may need to use a flashlight to see it clearly.
Step 5: Remove the Wiper Seal
Now it's time to remove the wiper seal. Use your seal removal tool to carefully pry the seal out of its groove. Be gentle and take your time, as you don't want to damage the cylinder or the rod. If the seal is really stuck, you can try using a little bit of lubricant to help loosen it. Once the seal is loose, you should be able to pull it out by hand.
Step 6: Clean the Cylinder and Rod
After you've removed the wiper seal, use your clean cloth to wipe down the cylinder and the rod. Make sure you remove any dirt, debris, or old seal material. This will help ensure a proper fit for the new seal.


Choosing the Right Replacement Seal
Now that you've removed the worn-out wiper seal, it's time to choose a replacement. As a Hydraulic Wiper Seals supplier, I can tell you that there are a lot of different types of seals available, each with its own unique properties and applications. Here are a few things to consider when choosing a replacement seal:
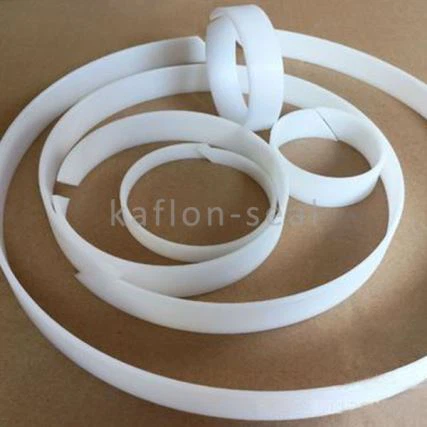
- Material: The material of the seal is important, as it will determine its durability, resistance to chemicals, and other properties. Common materials for wiper seals include rubber, polyurethane, and PTFE.
- Size: Make sure you choose a seal that is the right size for your hydraulic cylinder. You can usually find the size information on the old seal or in the manufacturer's specifications for your hydraulic system.
- Application: Consider the specific application of your hydraulic system when choosing a seal. For example, if your system is exposed to high temperatures or harsh chemicals, you'll need a seal that can withstand these conditions.
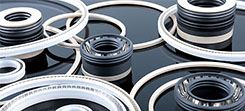
Some of the popular seals in the market include the Guiding Piston POM Guide Ring, the PTFE Piston Seal Glyd Ring, and the Double Acting PTFE With Rubber Seal. These seals are known for their high quality and performance.
Installing the New Wiper Seal
Once you've chosen the right replacement seal, it's time to install it. Here's how:
- Lubricate the Seal: Apply a thin layer of lubricant to the new seal. This will help it slide into place more easily and prevent it from getting damaged during installation.
- Insert the Seal: Carefully insert the new seal into the groove in the hydraulic cylinder. Make sure it is seated properly and that there are no gaps or wrinkles in the seal.
- Reassemble the Hydraulic Cylinder: Once the seal is installed, you can reassemble the hydraulic cylinder. Use your wrenches to tighten the bolts or nuts holding the cylinder in place. Make sure you don't overtighten them, as this can damage the cylinder or the seal.
- Reconnect the Hydraulic System: After the cylinder is reassembled, you can reconnect it to the hydraulic system. Follow the manufacturer's instructions for your specific system to make sure everything is connected properly.
- Pressurize the Hydraulic System: Once the system is reconnected, it's time to pressurize it. Again, follow the manufacturer's instructions for your specific system. Start the power and slowly increase the pressure in the system to the recommended level.
Testing the System
After you've installed the new wiper seal and pressurized the hydraulic system, it's important to test the system to make sure everything is working properly. Look for any signs of leaks or other problems. If you notice any leaks, stop the system immediately and check the installation of the seal. Make sure it is seated properly and that there are no gaps or wrinkles in the seal.
Conclusion
Removing and replacing a worn-out hydraulic wiper seal is an important part of maintaining your hydraulic system. By following these steps and using the right tools and replacement parts, you can ensure that your system continues to operate smoothly and efficiently. If you have any questions or need help choosing the right replacement seal, don't hesitate to contact us. As a Hydraulic Wiper Seals supplier, we have the expertise and experience to help you find the right solution for your needs. Whether you're looking for a Guiding Piston POM Guide Ring, a PTFE Piston Seal Glyd Ring, or a Double Acting PTFE With Rubber Seal, we've got you covered.
If you're interested in purchasing high-quality hydraulic seals for your business, we'd love to have a chat with you. Reach out to us to start a procurement discussion and find the perfect solutions for your hydraulic systems.
References
- "Hydraulic Seals Handbook" - A comprehensive guide to hydraulic seals and their applications.
- Manufacturer's instructions for your specific hydraulic system.